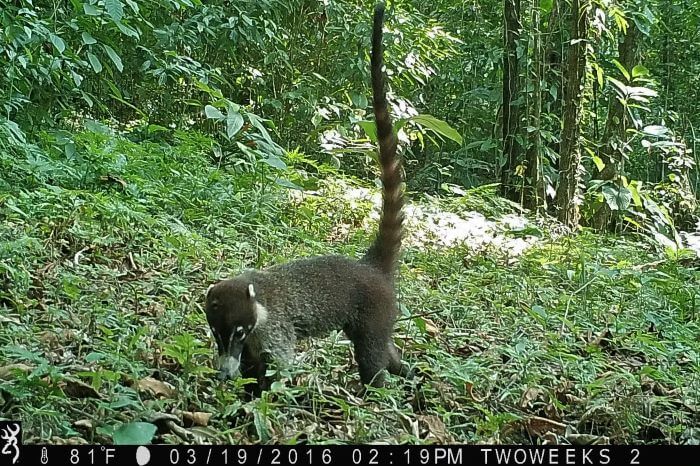
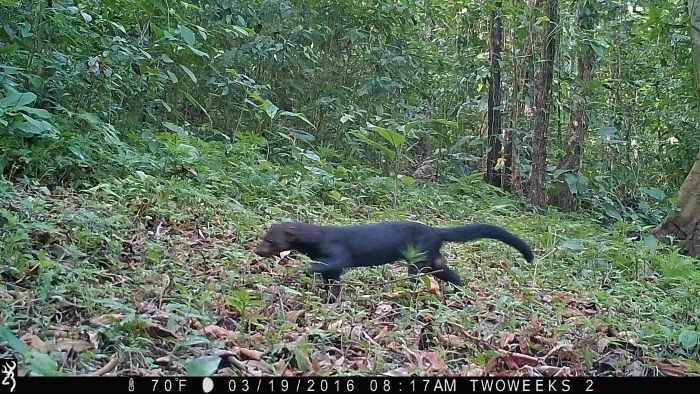
Almost everywhere we go in Costa Rica, we have a camera strung around our neck, ready to capture the diverse wildlife at a moment’s notice. But on all the roads, trails, paths, and parks we visit, we know that there is a lot more hiding that we just can’t see. Inspired by this, we decided to find out what kinds of animals were lurking in the jungle around our own backyard. In this post, we’ll tell you how we used two Browning Trail Cameras to spy on the wildlife in Costa Rica and let you know what creatures we discovered.

About the Trail Cameras
Trail cameras, sometimes called camera traps, aren’t anything new in Costa Rica. Researchers have been using various forms of them for decades to learn about animals, like the coati (pictured above). Essentially, these cameras sit in one location, usually strapped to a tree, and use sensors to snap pictures or video of whatever moves in front of them. The great thing is that trail-camera technology has come a long way over the years. Sophisticated units are now much more affordable to everyday nature enthusiasts like us. We’ve wanted one of these cameras for a while, and thanks to Browning Trail Cameras who sent us two of their most popular models, we’ve been spying on wildlife for a few months now.
Here are the two models we’ve been playing with:
Browning SPEC OPS Series – model BTC-8FHD (pictured below on the left)
Browning Recon Force Series – model BTC-7FHD (pictured below on the right)

Both of these trail cams look almost identical and shoot 10 MP images, full HD video with sound, and have other fun features like rapid-fire shooting and a time-lapse function. The key difference between them is the flash. The Recon model uses a standard infrared flash that is visible to people or animals at night, while the SPEC OPS model has an invisible infrared flash. Since the invisible flash doesn’t illuminate the scene as much, nighttime shots sometimes aren’t as clear with the SPEC OPS model. Invisible flash is better for those who are concerned that someone might discover their cameras at night. Some people also think that the visible flash could scare off animals. As you’ll see below, though, the wildlife we captured didn’t seem too shy anyway.
Setup
When we received the trail cameras from Browning, we could hardly wait to set them up. Luckily, it was really easy, essentially putting in some batteries and a memory card, and setting the time, date, and shooting mode.
Tips: One drawback of trail cameras like these is the batteries they use. Each of ours required eight AAs. Since batteries are so expensive in Costa Rica (about $1 each), we had some rechargeable ones brought down and they have worked out great. Another thing to consider is the speed of the SD card you buy. If you plan on using the camera to shoot in rapid-fire mode or HD video, faster SD cards like these will perform better on capture and playback.
Placement
Part of the fun with these cameras was getting them out in the jungle and figuring out where to put them. The area behind our house is very remote and there is hardly ever anyone walking through. Still, we weren’t sure what animals would be around and what parts of the forest they would be traveling through. After trying out the cameras on a main trail without much luck, we decided to go deeper into the woods and cut a new trail with a machete. While doing this, we found some faint animal trails and prints—a good sign that we were in the right spot.
After we found some spots that seemed hopeful, we attached the cameras to trees. When you do this, you can use the trail cam’s test mode to see if your angles are right. The motion sensor displays a small red light to tell you (when you wave your hand) if you are in the field of view. This was a little tedious but important.

As we moved the cameras around to different trees over the weeks and months, we learned some lessons. The biggest was that the vegetation in the jungle moved around a lot more than we expected. On a couple of occasions, a vine or branch fell down and covered most of the camera’s field of view, blocking any pictures from being taken. After that we made sure to chop back anything even remotely nearby. We also learned to attach the cameras very low to the ground, as most of the animals we saw were fairly small and wouldn’t trigger the camera if it was up higher. Some of the areas we found to be the most successful were near a small stream bed, along a narrow animal trail, and at the edge of a larger clearing where several trails met.
What We Saw
Over the last few months, our Browning Trail Cameras have captured over 1,000 photos and videos. We feel that they have performed really well, even with our learning curve. In the beginning, we mostly used the single shot function, which triggered quickly but had a delay of about five seconds between pictures. That didn’t work out too well. We usually only got one shot of each animal, sometimes blurred or part way out of the frame, and they were gone before the next picture was taken. But once in a while we did get some good ones.

When we switched to multi-shot mode, the camera took a lot more pictures at once and had a better chance of getting a good shot of faster moving animals. While we did get lots of images of the same animal over and over, the quality of them (in terms of being framed well) improved dramatically.


One surprise was that we didn’t get as many nighttime captures as we expected since the jungle is usually really active at night. Mostly we saw possums, armadillos, and occasionally an anteater. We aren’t sure if this was due to the cameras not sensing things in the dark as well or if it’s just normal to have less nighttime activity in the particular spots we chose.

A couple of other surprises that we didn’t expect were this vulture who came down to the stream for a drink.

And this cool animal, which is called a Greater Grison. If you look carefully, you can actually see two (one is right under the camera and the other is on the right in the stream bed). These animals are sort of like Badgers and not a lot is known about them. They usually travel solo so this is probably a mating pair!

Recently we started to experiment with the HD video settings too. As you can see from video below of the Great Curassows, an endangered turkey-like bird, the quality is pretty awesome.
So far, these camera traps have been a great success and a lot of fun. Every time we go out and retrieve them from the jungle we are surprised to see what has been scurrying by. And while we have been very happy with the birds and animals we’ve seen, we are really hoping to get an image of a big cat at some point. Stay tuned on our Facebook Page to see if we spot one.
Have you tried setting up a trail camera? What did you see and were there any surprises? Let us know in the comments below (Email subscribers click here to post your comment online.).
Special thanks to Browning Trail Cameras for providing us with these two cameras. All opinions in this review are honest and unbiased. We really liked how the cameras performed!

Hi there! Long time reader, first time poster. This is a great post. The Tayra and Grison shots are fantastic. Placing trail cams around your yard is a great way to see what wildlife comes around when you aren’t looking. Since moving to Tucson a year ago we have done the same. In fact, we have the same Browning cameras as you. We started with video but then switched to multi-shot pictures since it’s much easier to browse through the results. But, video can capture some great behavior. Here’s a link to our pictures so far: http://www.focusedonnature.com/Arizona/Trail-Cam-Photos/
As an aside, we just returned from our 5th trip to Costa Rica. Anyway, love the blog. Keep it up.
Hi Alan,
Thanks for sharing your site and funny that you are using the same Browning Trail Cams. Your pictures of the bobcats are awesome!
Awesome blog about camera traps. We use them too in Costa Rica. Couple of things that I noticed…the pair of grisons are extremely rare on camera traps. Great job. The anteater or tamandua is just the regular ant eater. The giant ant eater is a much different animal and is though to be extinct in Costa Rica. We use that stick method as well.
We have at least one browning camera that does fine(except when the ants get at it). Here is our blog about the wireless cameras. http://ovcamtraps.blogspot.com/
Hi ov-Frank, Thanks for checking out our camera trap post. We’ve actually been following your site for a while and you were one of the inspirations for us to see what was in our backyard, using camera traps. Thanks for the info about the tamandua, we’ll change that so it’s right. Yes we were really excited about the grisons since they are pretty rare to see. Noticed that you caught a pic of one too, very nice! Like you, we also have one of our cameras above a small waterfall, seems to be a high traffic area. Thanks again and best of luck with your cameras!
That pic of the vulture is unbelievable.
If you think it was fast enough to capture the vulture, and the image is clear when capturing a fast moving bird, it goes to show how good these cameras really are.
Hi Owen, Yeah, the cameras do a pretty good job keeping up with the animals. Low light is tougher, but overall, we can’t complain.